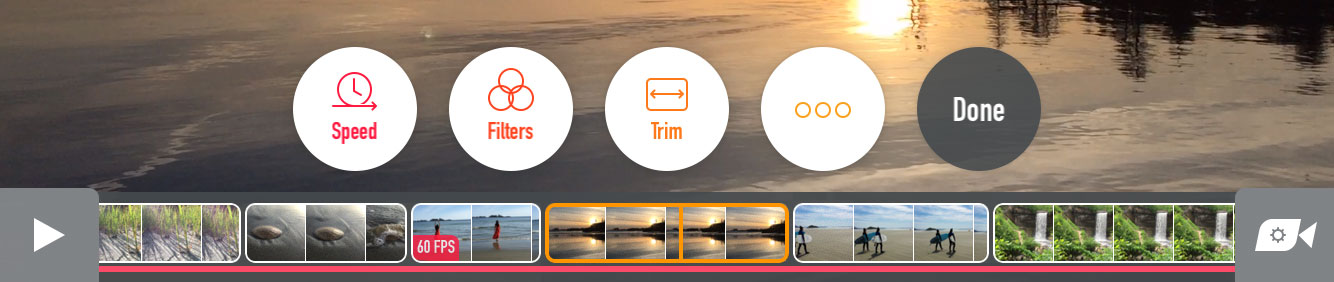
Editing Clips
Your clips appear in the Timeline. To edit a clip, find it in the timeline and tap it. The editing controls will appear above the clip.
You can play your clip while you’re editing it; it will loop your clip. This lets you preview your editing with the playing clip.
All edits in Vee are non-destructive (except for deleting), so you can keep trying things out and always change them back.
Speed
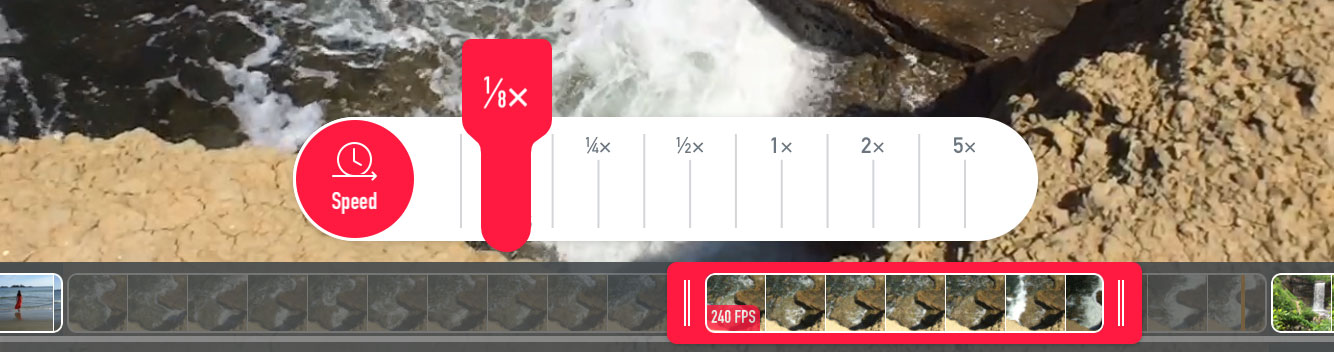
You can adjust the playback speed of your clip, to create slow motion or to speed it up. The speed panel shows the current clip speed. Drag the red thumb to set a new speed.
1× is real-time speed. This is the speed that you saw it happen! The thumb will snap to 1× when you drag it, so you get back to real-time easily.
Speeds to the left of 1× are slow motion. Vee limits you to fractional speeds that will yield a high quality result. The speed options available will depend upon the original frame rate of the clip (see Shooting Settings).
Speeds to the right of 1× are high speed. You can choose any speed up to 5× for your clip.
Tap “Speed” again to exit speed mode, or tap “Done” to exit editing mode. Your speed settings will be kept, and you can always edit the clip again to change them.
Speed Range
When you choose a speed other than 1×, you can also choose the part of your clip that is affected. Your clip zooms up to occupy most of the timeline, and red speed range handles appear on it. Drag the handles to choose when the speed you’ve chosen applies to the clip.
Vee will automatically play your video (after 1.5s) when you’ve adjusted the speed range, so you can preview your changes.
Filters
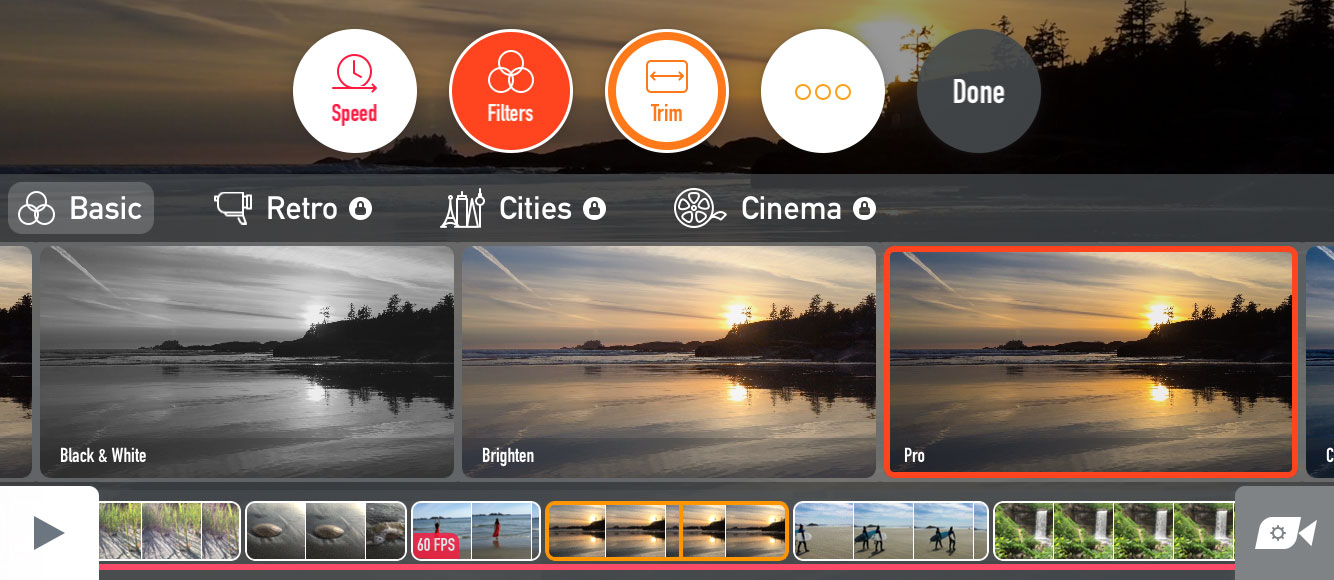
Try out one of Vee’s beautiful live filters on your clip. You can see a preview of each filter on your clip. If your clip is playing, each preview will also be playing through your video.
Tap a filter to apply it to your clip. You can change the filter at any time, so feel free to experiment!
To remove a filter, choose the “None” filter, which is the first option in the list.
You can exit filters mode without choosing a filter by tapping the “Filter” button again, or tap “Done” to exit editing mode.
Trim
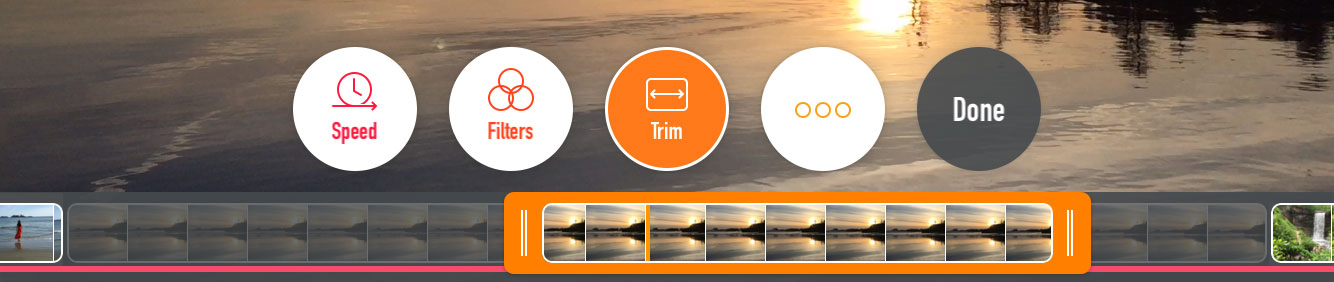
You can trim your clips, to choose just the best footage for your video.
When you choose Trim your clip zooms up to occupy most of the timeline, and orange trim handles appear on it. Drag the handles to choose how to trim your clip; the left handle sets when your clip will start playing, and the right handle sets when your clip will end.
Vee will automatically play your video (after 1.5s) when you’ve adjusted the trim, so you can preview your changes.
See Duplicate below for ideas on applying multiple trims to a clip.
Tap “Trim” again to exit trimming mode, or tap “Done” to exit editing mode. Your trim will be kept, and you can always edit the clip again to change it.
More…
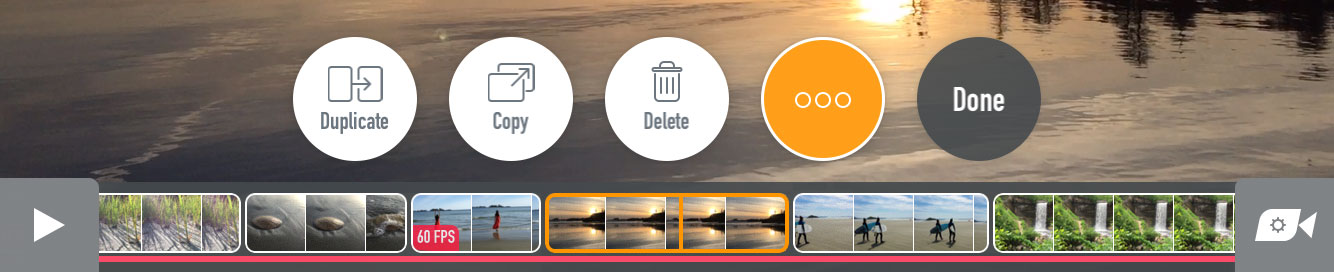
The ••• button contains some additional options for editing your clip:
-
Duplicate
Duplicates the current clip, placing the copy immediately after this clip in the timeline. This enables you to repeat footage, for instant-replays, or to trim the same clip multiple times to choose different sections of footage.
When you duplicate a clip it doesn’t use any extra storage space on your device.
-
Copy
Copies the clip to the pasteboard so you can paste it elsewhere in the timeline, or in another video in Vee.
-
Paste
Pastes a clip from the pasteboard in the timeline immediately after this clip. The Paste button will be disabled if there isn’t a suitable clip on the pasteboard.
You can paste clips that you’ve copied from within Vee, including from other videos. You can also paste videos that you’ve copied from other apps.
When you paste a clip from within Vee it doesn’t use any additional storage space.
-
Delete
Deletes the clip. Note, once a clip is deleted it cannot be recovered so please make sure you don’t delete something you still want!
You can safely delete a clip that has been deleted or copied.
You can also delete a clip by dragging it from the timeline, read more.
Done
Exits editing mode. Your edits are always saved, so you never need to worry about losing your changes.
You can also exit editing mode by dragging the timeline so the editing clip disappears off the screen, or by tapping the clip again (when not in speed or trimming mode).
Mute

Vee mutes your clip by default while you’re editing. You can turn on sound while you’re editing using the Mute button.